hexo基础搭建教程(二)
前言📇
- 本文参考Hexo博客搭建基础教程(二)
- 本系列基本上都是各位大佬造好的轮子,具体参考 Fomalhaut大佬。其目的在于防止各位大佬的链接失效,且个人复习总结使用,如有侵权请联系删除。
- 本系列起始空白的虚拟机,一步一步搭建魔改页面,使用本地端口。若想部署在其它平台,可自寻查找。
- 鉴于每个人的根目录名称都不一样,本帖博客根目录一律以
[BlogRoot]指代。- 本帖涉及魔改源码的内容,会使用diff代码块标识,复制时请不要忘记删除前面的
+、-符号。- 因为
.pug和.styl以及.yml等对缩进要求较为严格,请尽量不要使用记事本等无法提供语法高亮的文本编辑器进行修改。- 本系列基于
Butterfly主题进行魔改方案编写,hexo 版本6.3.0,Butterfly 版本4.12.0。- 魔改会过程常常引入自定义的css与js文件,具体方法见方法见Hexo博客添加自定义css和js文件
博客搭建与魔改系列教程导航🚥🚥🚥
- 🎀hexo基础搭建教程(一)
- 🎆hexo基础搭建教程(二)⬅当前位置🛸
- 🎇魔改教程总结(一)
- 🧨魔改教程总结(二)
- ✨魔改教程总结(三)
1. 安装主题
本系列用的主题版本为Butterfly@4.12.0,使用 github 方式安装
-
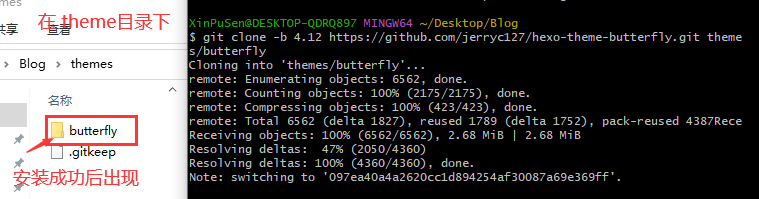
在
[BlogRoot](我这里是C:\Users\XinPuSen\Desktop\Blog)目录下打开git bash命令行模式1
git clone -b 4.12 https://github.com/jerryc127/hexo-theme-butterfly.git themes/butterfly

-
应用主题
-
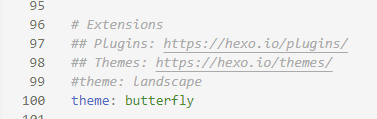
修改站点配置文件
[BlogRoot/_config.yml],把主题改为butterfly,可以按ctrl+f快速寻找。 -
如果你没有
pug以及stylus的渲染器,请下载安装,这两个渲染器是Butterfly生成基础页面所需的依赖包:1
npm install hexo-renderer-pug hexo-renderer-stylus --save
- —save:表示会写入
package.json
如果卡在
still ideaTree buildDeps使用镜像:npm config set registry http://npmmirror.com - —save:表示会写入
-
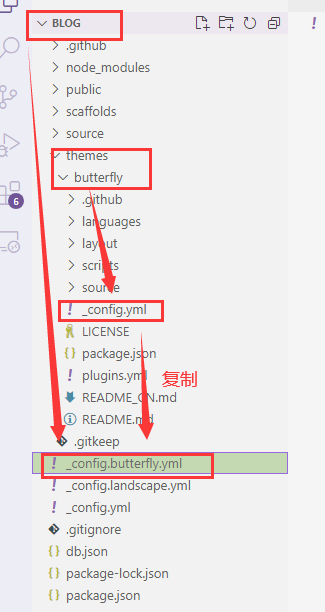
为了减少升级主题后带来的不便,请使用以下方法(建议,可以不做,高度魔改的一般都不会升级主题了,不然魔改的会被覆盖掉)
把主题文件夹【[BlogRoot]\themes\butterfly】中的_config.yml复制到 Hexo 根目录里(我这里路径为【C:\Users\XinPuSen\Desktop\Blog】),同时重新命名为_config.butterfly.yml。以后只需要在_config.butterfly.yml进行配置即可生效。Hexo会自动合并主题中的_config.yml和_config.butterfly.yml里的配置,如果存在同名配置,会使用_config.butterfly.yml的配置,其优先度较高。
-
2. 基础用法说明
2.1 Front-matter
Front-matter 是 markdown 文件最上方以---分隔的区域,用于指定个别档案的变数。
- Page Front-matter 用于页面配置
- Post Front-matter 用于文章页配置
如果标注可选的参数,可根据自己需要添加,不用全部都写
Page Front-matter:
1 |
|
| 写法 | 解释 |
|---|---|
| title | 【必需】页面标题 |
| date | 【必需】页面创建日期 |
| type | 【必需】标籤、分类和友情链接三个页面需要配置 |
| updated | 【可选】页面更新日期 |
| description | 【可选】页面描述 |
| keywords | 【可选】页面关键字 |
| comments | 【可选】显示页面评论模块(默认 true) |
| top_img | 【可选】页面顶部图片 |
| mathjax | 【可选】显示mathjax(当设置mathjax的per_page: false时,才需要配置,默认 false) |
| kates | 【可选】显示katex(当设置katex的per_page: false时,才需要配置,默认 false) |
| aside | 【可选】显示侧边栏 (默认 true) |
| aplayer | 【可选】在需要的页面加载aplayer的js和css,请参考文章下面的音乐 配置 |
| highlight_shrink | 【可选】配置代码框是否展开(true/false)(默认为设置中highlight_shrink的配置) |
Post Front-matter:
1 |
|
| 写法 | 解释 |
|---|---|
| title | 【必需】文章标题 |
| date | 【必需】文章创建日期 |
| updated | 【可选】文章更新日期 |
| tags | 【可选】文章标籤 |
| categories | 【可选】文章分类 |
| keywords | 【可选】文章关键字 |
| description | 【可选】文章描述 |
| top_img | 【可选】文章顶部图片 |
| cover | 【可选】文章缩略图(如果没有设置top_img,文章页顶部将显示缩略图,可设为false/图片地址/留空) |
| comments | 【可选】显示文章评论模块(默认 true) |
| toc | 【可选】显示文章TOC(默认为设置中toc的enable配置) |
| toc_number | 【可选】显示toc_number(默认为设置中toc的number配置) |
| toc_style_simple | 【可选】显示 toc 简洁模式 |
| copyright | 【可选】显示文章版权模块(默认为设置中post_copyright的enable配置) |
| copyright_author | 【可选】文章版权模块的文章作者 |
| copyright_author_href | 【可选】文章版权模块的文章作者链接 |
| copyright_url | 【可选】文章版权模块的文章连结链接 |
| copyright_info | 【可选】文章版权模块的版权声明文字 |
| mathjax | 【可选】显示mathjax(当设置mathjax的per_page: false时,才需要配置,默认 false) |
| katex | 【可选】显示katex(当设置katex的per_page: false时,才需要配置,默认 false) |
| aplayer | 【可选】在需要的页面加载aplayer的js和css,请参考文章下面的音乐 配置 |
| highlight_shrink | 【可选】配置代码框是否展开(true/false)(默认为设置中highlight_shrink的配置) |
| aside | 【可选】显示侧边栏 (默认 true) |
注意:我的博客根目录路径为 【C:\Users\XinPuSen\Desktop\Blog】,下文所说的根目录都是此路径,将用[BlogRoot]代替。
2.2 标签页
-
前往你的Hexo博客根目录,打开
Git Bash执行如下命令:1
hexo new page tags
-
在
[BlogRoot]\source\会生成一个含有index.md文件的tags文件夹。 -
修改
[BlogRoot]\source\tags\index.md,添加type: "tags"。1
2
3
4
5
title: 标签
date: 2022-10-28 12:00:00
type: "tags"
2.3 友情链接
-
前往你的Hexo博客根目录,打开cmd命令窗口执行如下命令:
1
hexo new page link
-
在
[BlogRoot]\source\会生成一个含有index.md文件的link文件夹 -
修改
[BlogRoot]\source\link\index.md,添加type: "link"1
2
3
4
5
title: 友情链接
date: 2022-10-28 12:00:00
type: "link" -
前往
[BlogRoot]\source\_data创建一个link.yml文件(如果沒有_data文件夹,请自行创建),并写入如下信息(根据你的需要写):1
2
3
4
5
6
7
8
9
10
11
12
13
14
15
16
17- class_name: 1.技术支持
class_desc: 本网站的搭建由以下开源作者提供技术支持
link_list:
- name: Hexo
link: https://hexo.io/zh-cn/
avatar: https://d33wubrfki0l68.cloudfront.net/6657ba50e702d84afb32fe846bed54fba1a77add/827ae/logo.svg
descr: 快速、简单且强大的网志框架
siteshot: https://source.fomal.cc/siteshot/hexo.io.jpg
- class_name: 2.友情链接
class_desc: 一些好朋友~~
link_list:
- name: Fomalhaut🥝
link: https://fomal.cc/
avatar: /assets/head.jpg
descr: Future is now 🍭🍭🍭
siteshot: https://source.fomal.cc/siteshot/www.fomal.cn.jpgclass_name和class_desc支持 html 格式,如不需要,也可以留空。
2.4 分类页
-
前往你的Hexo博客根目录,打开cmd命令窗口执行如下命令:
1
hexo new page categories
-
在
[BlogRoot]\source\会生成一个含有index.md文件的categories文件夹 -
修改
[BlogRoot]\source\categories\index.md,添加type: "categories"1
2
3
4
5---
title: 分类
date: 2024-02-21 23:40:05
type: "categories"
---
2.5 关于我
-
前往你的Hexo博客根目录,打开cmd命令窗口执行如下命令:
1
2shell
hexo new page about -
在
[BlogRoot]\source\会生成一个含有index.md文件的about文件夹 -
修改
[BlogRoot]\source\about\index.md,添加type: "about"1
2
3
4
5---
title: 关于我
date: 2024-02-21 23:44:48
type: "about"
---
3. 语言
修改站点配置文件_config.yml,默认语言是 en 。
主题支持三种语言:
- default(en)
- zh-CN (简体中文)
- zh-TW (繁体中文)
4. 网站资料
修改网站各种资料,例如标题、副标题和邮箱等个人资料,请修改站点配置文件_config.yml。部分参数如下,详细参数可参考官方的配置描述。
| 参数 | 描述 |
|---|---|
| title | 网站标题 |
| subtitle | 描述 |
| description | 网站描述 |
| keywords | 网站的关键词。支持多个关键词 |
| author | 您的名字 |
| language | 网站使用的语言。对于简体中文用户来说,使用不同的主题可能需要设置成不同的值,请参考你的主题的文档自行设置,常见的有 zh-Hans和 zh-CN。 |
| timezone | 网站时区。Hexo 默认使用您电脑的时区。请参考 时区列表 进行设置,如 America/New_York, Japan, 和 UTC 。一般的,对于中国大陆地区可以使用 Asia/Shanghai |
5. 主题配置文件
_config_butterfly.yml:butterfly 主题配置文件,修改的开关都在这里
5.1 导航菜单
修改主题配置文件_config.butterfly.yml
1 | menu: |
- 必须是
/xxx/,后面||分开,然后写图标名,如果不想显示图标,图标名可不写 - 若主题版本大于 v4.0.0,可以直接在子目录里添加 hide 隐藏子目录,如下面的List
1 | menu: |
- 文字可自行更改,中英文都可以
1 | menu: |
最终效果如下:
5.2 代码
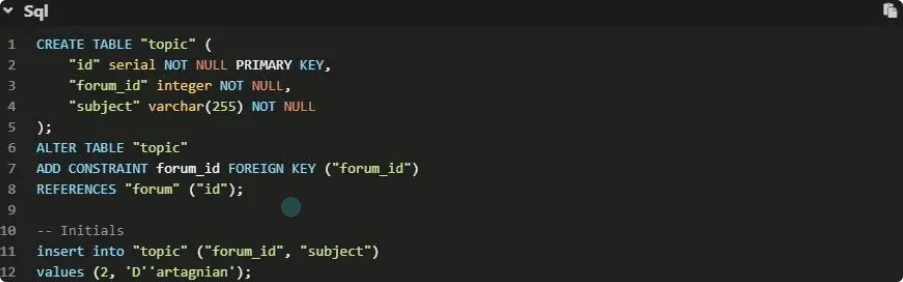
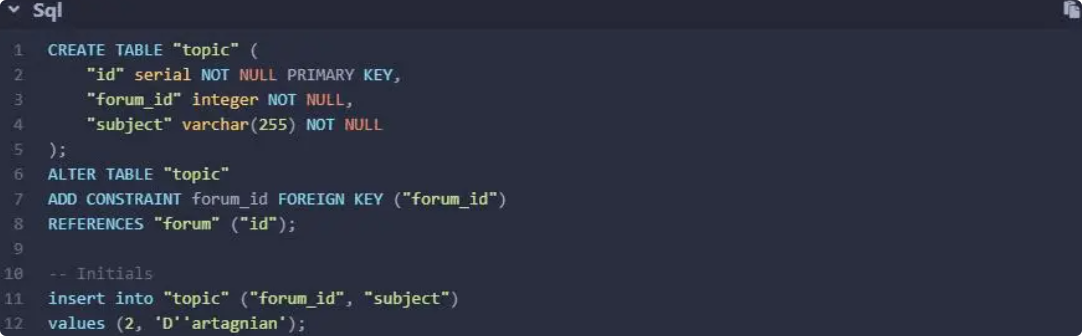
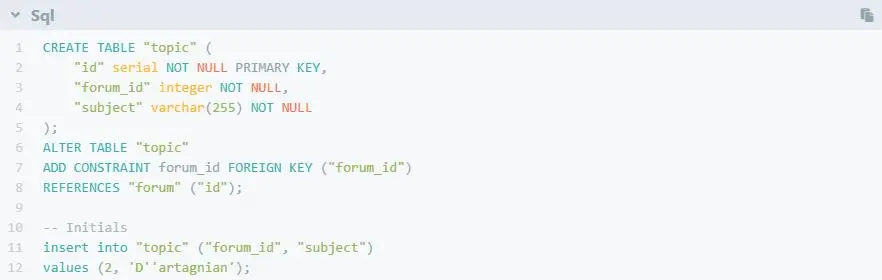
5.2.1 代码高亮主题
Butterfly支持 6 种代码高亮样式:
- darker
- pale night
- light
- ocean
- mac
- mac light
修改主题配置文件_config.butterfly.yml中的highlight_theme属性。
1 | highlight_theme: darker |
1 | highlight_theme: pale night |
1 | highlight_theme: light |
1 | highlight_theme: ocean |
1 | highlight_theme: mac |
1 | highlight_theme: mac light |
5.2.2 代码复制
修改主题配置文件_config.butterfly.yml中的highlight_copy属性,true表示可以复制。
1 | highlight_copy: true |
5.2.3 代码框展开\关闭
修改主题配置文件_config.butterfly.yml。中的highlight_shrink属性。
1 | highlight_shrink: false #代码框展开,有>点击按钮 |
在默认情况下,代码框自动展开,可设置是否所有代码框都关闭状态,点击>可展开代码。
- true 全部代码框不展开,需点击>打开
- false 代码框展开,有>点击按钮
- none 不显示>按钮
5.2.4 代码换行
在默认情况下,Hexo 在编译的时候不会实现代码自动换行。如果你不希望在代码块的区域里有横向滚动条的话,那么你可以考虑开启这个功能。
修改主题配置文件_config.butterfly.yml中的code_word_wrap属性。
1 | code_word_wrap: true |
5.2.5 代码高度限制
可配置代码高度限制,超出的部分会隐藏,并显示展开按钮。
1 | highlight_height_limit: 200 # unit: px |
- 单位是
px,直接添加数字,如 200 - 实际限制高度为
highlight_height_limit + 30 px,多增加 30px 限制,目的是避免代码高度只超出highlight_height_limit 一点时,出现展开按钮,展开没内容。 - 不适用于隐藏后的代码块( css 设置
display: none)。
5.3 社交图片
Butterfly支持font-awesome v6图标。
书写格式:图标名:url || 描述性文字。
1 | social: |
5.4 顶部图
如果不要显示顶部图,可直接配置 disable_top_img: true。
| 配置 | 解释 |
|---|---|
| index_img | 主页的 top_img |
| default_top_img | 默认的 top_img,当页面的 top_img 没有配置时,会显示 default_top_img |
| archive_img | 归档页面的 top_img |
| tag_img | tag子页面 的 默认 top_img |
| tag_per_img | tag子页面的 top_img,可配置每个 tag 的 top_img |
| category_img | category 子页面 的 默认 top_img |
| category_per_img | category 子页面的 top_img,可配置每个 category 的 top_img |
修改主题配置文件_config.butterfly.yml
1 | index_img: xxx.png |
其它页面 (tags/categories/自建页面)和文章页的top_img,请到对应的 md 页面设置front-matter中的top_img。
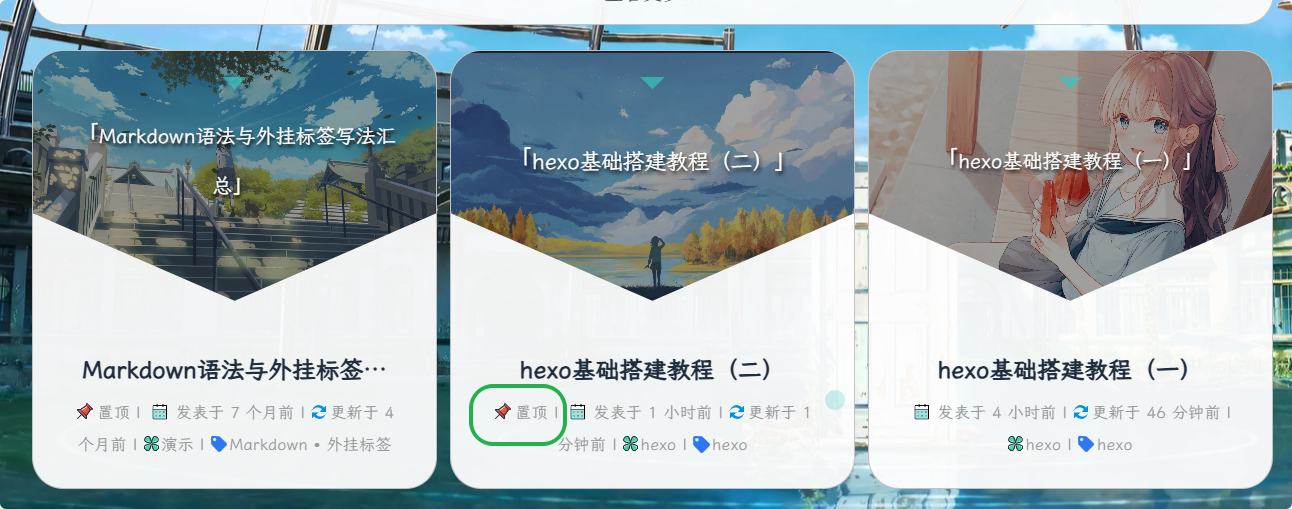
5.5 文章置顶和封面
-
你可以直接在文章的
front-matter区域里添加sticky: 1属性来把这篇文章置顶。数值越大,置顶的优先级越大。 -
文章的markdown文档上,在
Front-matter添加cover,并填上要显示的图片地址。如果不配置cover,可以设置显示默认的cover;如果不想在首页显示cover,可以设置为false。
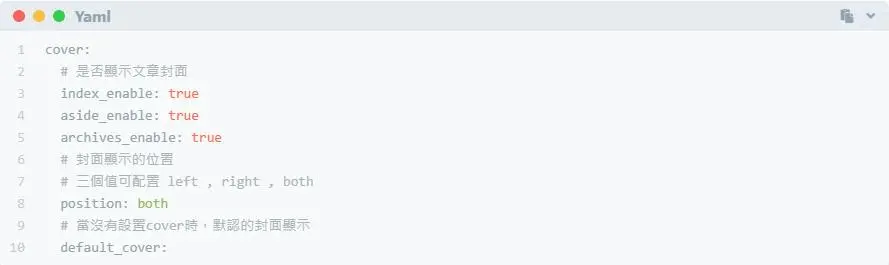
修改主题配置文件_config.butterfly.yml。1
2
3
4
5
6
7
8
9
10cover:
# 是否显示文章封面
index_enable: true
aside_enable: true
archives_enable: true
# 封面显示的位置
# 三个值可配置 left , right , both
position: both
# 当没有设置cover时,默认的封面显示
default_cover:当配置多张图片时,会随机选择一张作为cover,此时写法应为:
1
2
3
4
5default_cover:
- /img/bg1.webp
- /img/bg2.webp
- /img/bg3.webp
- /img/bg4.webp这里
/目录指source目录
5.6 文章页相关配置
5.6.1 文章 meta 显示
post_meta这个属性用于显示文章的相关信息的,修改主题配置文件_config.butterfly.yml。
1 | post_meta: |
5.6.2 文章版权和协议许可
修改主题配置文件_config.butterfly.yml
1 | post_copyright: |
由于Hexo 4.1开始,默认对网址进行解码,以至于如果是中文网址,会被解码,可设置decode: true来显示中文网址。如果有文章(例如:转载文章)不需要显示版权,可以在文章页Front-matter中单独设置。
1 | copyright: false |
从v3.0.0开始,支持对单独文章设置版权信息,可以在文章Front-matter单独设置。
1 | post_copyright: |
5.6.3 文章打赏
修改主题配置文件_config.butterfly.yml
1 | reward: |
5.6.4 文章目录TOC
修改主题配置文件_config.butterfly.yml。
1 | yml |
5.6.5 相关文章推荐
相关文章推荐的原理是根据文章tags的比重来推荐,修改主题配置文件_config.butterfly.yml。
1 | related_post: |
5.6.6 文章过期提醒
可设置是否显示文章过期提醒,以更新时间为基准。
1 | # Displays outdated notice for a post (文章过期提醒) |
5.6.7 文章分页按钮
修改主题配置文件_config.butterfly.yml
1 | # post_pagination (分页) |
5.7 头像
1 | avatar: |
5.8 文章内容复制相关配置
1 | # copy settings |
5.9 Footer 设置
修改主题配置文件_config.butterfly.yml
1 | footer: |
可以参考tzy大佬的的custom_text填写示例:
1 | custom_text: I wish you to become your own sun, no need to rely on who's light.<p><a target="_blank" href="https://hexo.io/"><img src="https://img.shields.io/badge/Frame-Hexo-blue?style=flat&logo=hexo" title="博客框架为Hexo"></a> <a target="_blank" href="https://butterfly.js.org/"><img src="https://img.shields.io/badge/Theme-Butterfly-6513df?style=flat&logo=bitdefender" title="主题采用butterfly"></a> <a target="_blank" href="https://www.jsdelivr.com/"><img src="https://img.shields.io/badge/CDN-jsDelivr-orange?style=flat&logo=jsDelivr" title="本站使用JsDelivr为静态资源提供CDN加速"></a> <a target="_blank" href="https://vercel.com/ "><img src="https://img.shields.io/badge/Hosted-Vervel-brightgreen?style=flat&logo=Vercel" title="本站采用双线部署,默认线路托管于Vercel"></a> <a target="_blank" href="https://vercel.com/ "><img src="https://img.shields.io/badge/Hosted-Coding-0cedbe?style=flat&logo=Codio" title="本站采用双线部署,联通线路托管于Coding"></a> <a target="_blank" href="https://github.com/"><img src="https://img.shields.io/badge/Source-Github-d021d6?style=flat&logo=GitHub" title="本站项目由Gtihub托管"></a> <a target="_blank" href="http://creativecommons.org/licenses/by-nc-sa/4.0/"><img src="https://img.shields.io/badge/Copyright-BY--NC--SA%204.0-d42328?style=flat&logo=Claris" title="本站采用知识共享署名-非商业性使用-相同方式共享4.0国际许可协议进行许可"></a></p> |

对于部分人需要写 ICP 的,也可以写在custom_text里。
1 | custom_text: <a href="icp链接"><img class="icp-icon" src="icp图片"><span>备案号:xxxxxx</span></a> |
5.10 右下角按钮
5.10.1 简繁转换
修改主题配置文件_config.butterfly.yml
1 | translate: |
5.10.2 夜间模式
修改主题配置文件_config.butterfly.yml
1 | # dark mode |
v2.0.0 开始增加一个选项,可开启自动切换light mode 和 dark mode。
autoChangeMode: 1跟随系统而变化,不支持的浏览器/系统将按照时间晚上6点到早上6点之间切换为 dark mode。autoChangeMode: 2只按照时间 晚上6点到早上6点之间切换为 dark mode,其余时间为light mode。autoChangeMode: false取消自动切换。
5.10.3 阅读模式
阅读模式下会去掉除文章外的内容,避免干扰阅读。只会出现在文章页面,右下角会有阅读模式按钮。
修改主题配置文件_config.butterfly.yml
1 | readmode: true |
5.11 侧边栏设置
5.11.1 排版
可自行决定哪个项目需要显示,可决定位置,也可以设置不显示侧边栏。
修改主题配置文件_config.butterfly.yml,下面是本人博客的配置项可以参考
1 | aside: |
5.11.2 访问人数(UV 和 PV)
修改主题配置文件_config.butterfly.yml
1 | busuanzi: |
5.11.3 运行时间
修改主题配置文件_config.butterfly.yml
1 | # Time difference between publish date and now (網頁運行時間) |
5.11.4 最新评论
v3.1.0 以上支持。如果未配置任何评论,前先不要开启该功能。
最新评论只会在刷新时才会去读取,并不会实时变化。
由于 API 有 访问次数限制,为了避免调用太多,主题默认存取期限为 10 分鐘。也就是説,调用后资料会存在 localStorage 里,10分鐘内刷新网站只会去 localStorage 读取资料。 10 分鐘期限一过,刷新页面时才会去调取 API 读取新的数据。(3.6.0 新增了 storage 配置,可自行配置缓存时间)。
修改主题配置文件_config.butterfly.yml
1 | # Aside widget - Newest Comments |
5.12 网站背景
修改主题配置文件_config.butterfly.yml
1 | # 图片格式 url(http://xxxxxx.com/xxx.jpg) |
如果你的网站根目录不是'/',使用本地图片时,需加上你的根目录。
例如:网站是 https://yoursite.com/blog,引用一张img/xx.png图片,则设置background为 url(/blog/img/xx.png),/指的是/source目录。
5.13 打字效果
修改主题配置文件_config.butterfly.yml
1 | # Typewriter Effect (打字效果) |
5.14 footer 背景
修改主题配置文件_config.butterfly.yml
1 | # footer是否显示图片背景(与top_img一致) |
留空/false:显示默认的颜色图片链接:显示所配置的图片颜色包括HEX值 - #0000FF | RGB值 - rgb(0,0,255) | 颜色单词 - orange | 渐变色 - linear-gradient( 135deg, #E2B0FF 10%, #9F44D3 100%):对应的颜色true:显示跟 top_img 一样
5.15 背景特效
可设置每次刷新更换彩带,或者每次点击更换彩带。详细配置可查看canvas_ribbon
修改主题配置文件_config.butterfly.yml
1 | canvas_ribbon: |
好看的彩带背景,会飘动。
修改主题配置文件_config.butterfly.yml
1 | canvas_fluttering_ribbon: |
修改主题配置文件_config.butterfly.yml
1 | canvas_nest: |
5.16 鼠标点击效果
zIndex建议只在-1和9999上选。
-1 代表烟火效果在底部。
9999 代表烟火效果在前面。
修改主题配置文件_config.butterfly.yml
1 | fireworks: |
修改主题配置文件_config.butterfly.yml
1 | # 点击出現爱心 |
修改主题配置文件_config.butterfly.yml
1 | # 点击出现文字,文字可自行修改 |
5.17 自定义字体和字体大小
5.17.1 全局字体
修改主题配置文件_config.butterfly.yml中的font-family属性即可,如不需要配置,请留空。
1 | # Global font settings |
5.17.2 Blog 标题字体
修改主题配置文件_config.butterfly.yml中的blog_title_font属性即可,如不需要配置,请留空。
如不需要使用网络字体,只需要把font_link留空就行。
1 | # Font settings for the site title and site subtitle |
5.18 网站副标题
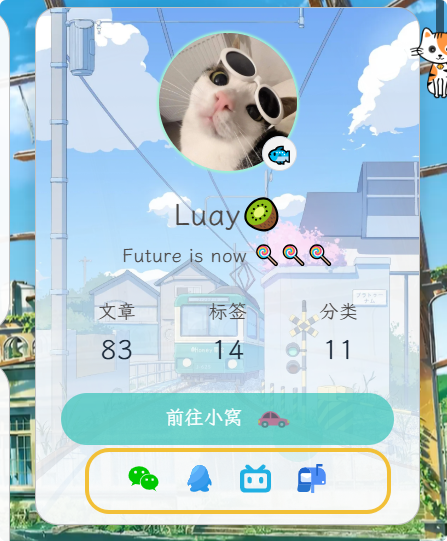
可设置主页中显示的网站副标题或者喜欢的座右铭。
修改主题配置文件_config.butterfly.yml中的subtitle
1 | # the subtitle on homepage (主頁subtitle) |
预览效果见本站主页:风筝上的猫🍡
5.19 页面加载动画preloader
当进入网页时,因为加载速度的问题,可能会导致top_img图片出现断层显示,或者网页加载不全而出现等待时间,开启preloader后,会显示加载动画,等页面加载完,加载动画会消失。
1 | # 加载动画 Loading Animation |
5.20 字数统计
注意必须要安装依赖才能设置为true,否则会报错!
- 安装插件:在你的博客根目录,打开cmd命令窗口执行
npm install hexo-wordcount --save。 - 开启配置:修改主题配置文件
_config.butterfly.yml中的wordcount。
1 | wordcount: |
5.21 图片放大查看
修改主题配置文件_config.butterfly.yml中fancybox属性
1 | # fancybox http://fancyapps.com/fancybox/3/ |
5.22 Pjax
当用户点击链接,通过 ajax 更新页面需要变化的部分,然后使用 HTML5 的 pushState 修改浏览器的 URL 地址。这样可以不用重复加载相同的资源(css/js), 从而提升网页的加载速度。
1 | # Pjax [Beta] |
注意:使用 pjax 后,一些自己DIY的js可能会无效,跳转页面时需要重新调用(例如朋友圈、说说等),具体请参考Pjax文档。
5.23 Inject
如想添加额外的 js/css/meta 等等东西,可以在 Inject 里添加,head(</body>标签之前), bottom(</html>标签之前)。
1 | # Inject |
5.24 本地搜索系统
-
安装依赖:前往博客根目录,打开cmd命令窗口执行
npm install hexo-generator-search --save。1
npm install hexo-generator-search --save
-
注入配置:修改站点配置文件
_config.yml,添加如下代码:1
2
3
4
5# 本地搜索
search:
path: search.xml
field: post
content: true -
主题中开启搜索:在主题配置文件
_config.butterfly.yml中修改以下内容:1
2
3
4diff
local_search:
- enable: false
+ enable: true -
重新编译运行,即可看到效果:前往博客根目录,打开cmd命令窗口依次执行如下命令:
1
2hexo cl && hexo generate
hexo s -p 8000详情可参考 hexo-generator-search
5.25 主题颜色
在_config.butterfly.yml中,开启美化,将网站主题颜色修改
1 | # Beautify/Effect (美化/效果) |
这里也可以修改颜色,比如按钮、切割线等。
基础介绍已完成,下面将是 butterfly 主题魔改部分!